Create an image gallery in WordPress 5.0 +
Do you have a bunch of beautiful images that you are ready to share with your website audience? Instead of adding them to your blog post in a single column why not create an image gallery where you add them in 2; 3 or even 4 columns? Better yet, why not create a masonry gallery layout where you mix the column count!
In this article, I’m going to show you exactly how to create an image gallery in your post or page without the need to install extra plugins, use shortcodes, or write custom code.
We will be using the new block editor (Gutenberg), merged in WordPress since 5.0. In order to follow this tutorial, you will need to make sure your block editor is activated and you’re using a WordPress theme that supports the new WordPress block editor.
Ok, let’s create some galleries!
Add an image gallery
The new WordPress block editor makes it really easy to add an image gallery to your blog post or even a page!
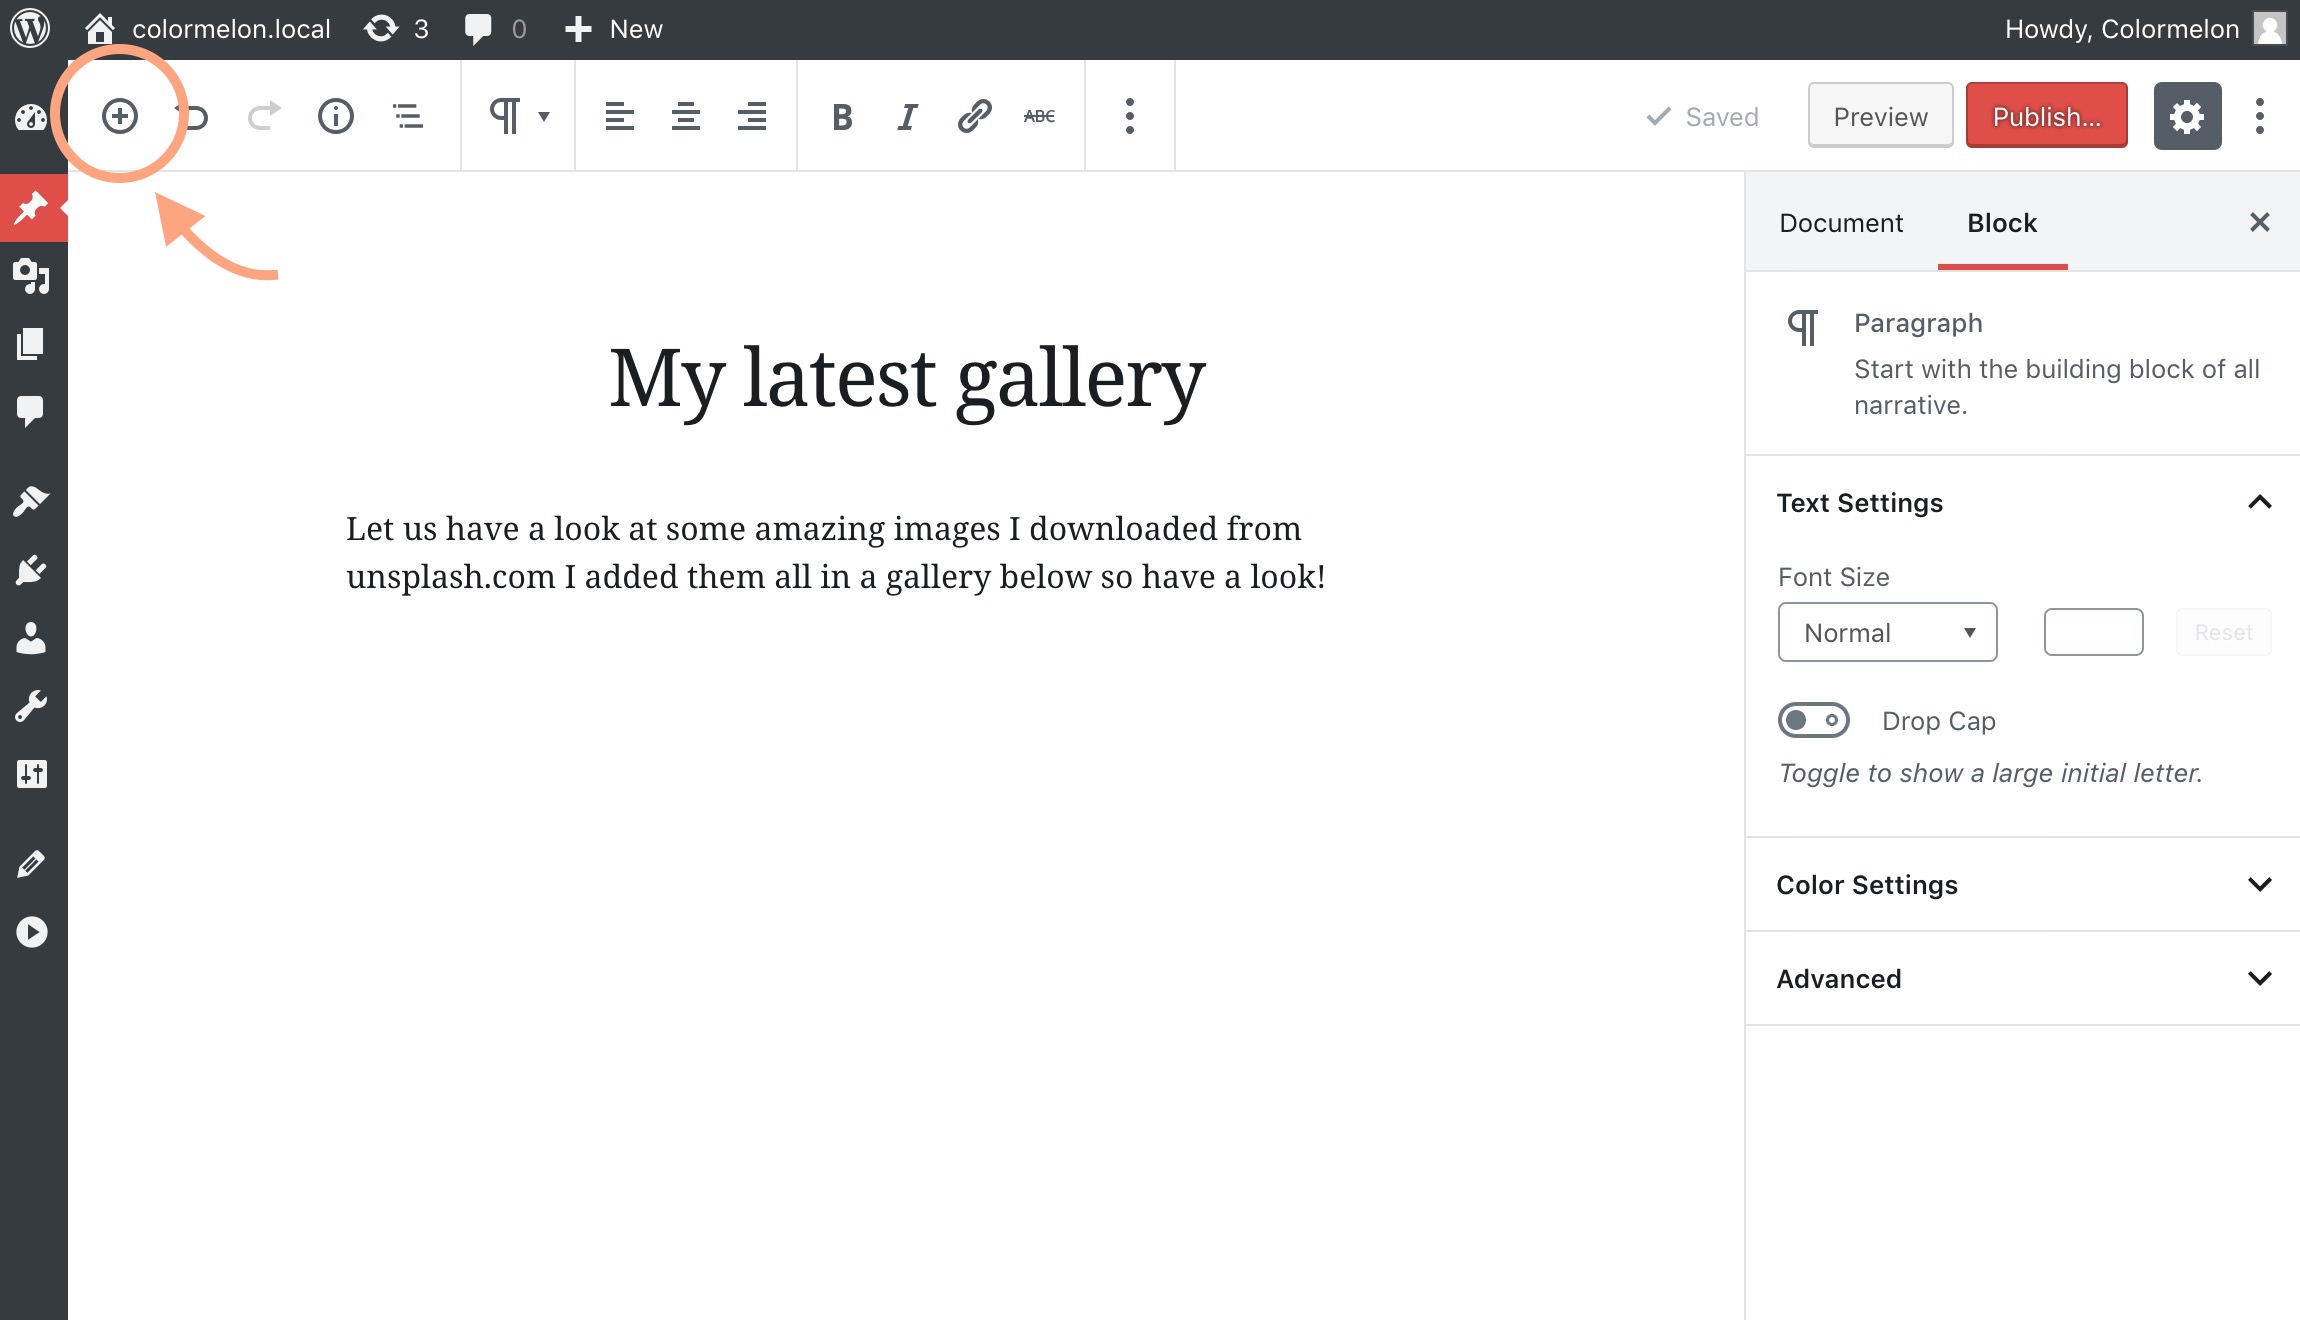
Step 1
Add a new block by clicking on the “+” button located in the top left corner of your screen and choose the “Gallery” block.
There are three more ways to add a new block:
- Press the Enter key on your keyboard to add a new block and then click on the “+” icon on the left side of the new block and choose “gallery”
- Press the Enter key and then click on the “gallery” icon that shows up when you place your mouse cursor over the new block area.
- Or press the slash button “/” on your keyboard and just start typing the name of the block you want to use – in this case, gallery.
See all these options in action in the demonstration below.
Choose the option that suits your workflow best. Personally, I prefer the “/ and type” method best.
Step 2
Now click on the “Upload” button to upload images from your computer to your image gallery. If your images are already uploaded onto your WordPress installation, click the “Media Library” button instead.
Step 3
Before selecting your images, you need to decide on the gallery layout. There are two options – grid or masonry.
Grid-style image gallery
If you want to create a simple “grid-style” gallery with 2 – 4 images in each row, select all images in a single go, rearrange them if needed and click on the “Insert Gallery” button.
Just like in my video example above, your images will be arranged in 3 columns and they will be cropped.
I chose to use 7 images for my gallery. Since you can’t arrange 7 images in an equal 3 column layout, the 7th image stands alone in my example.
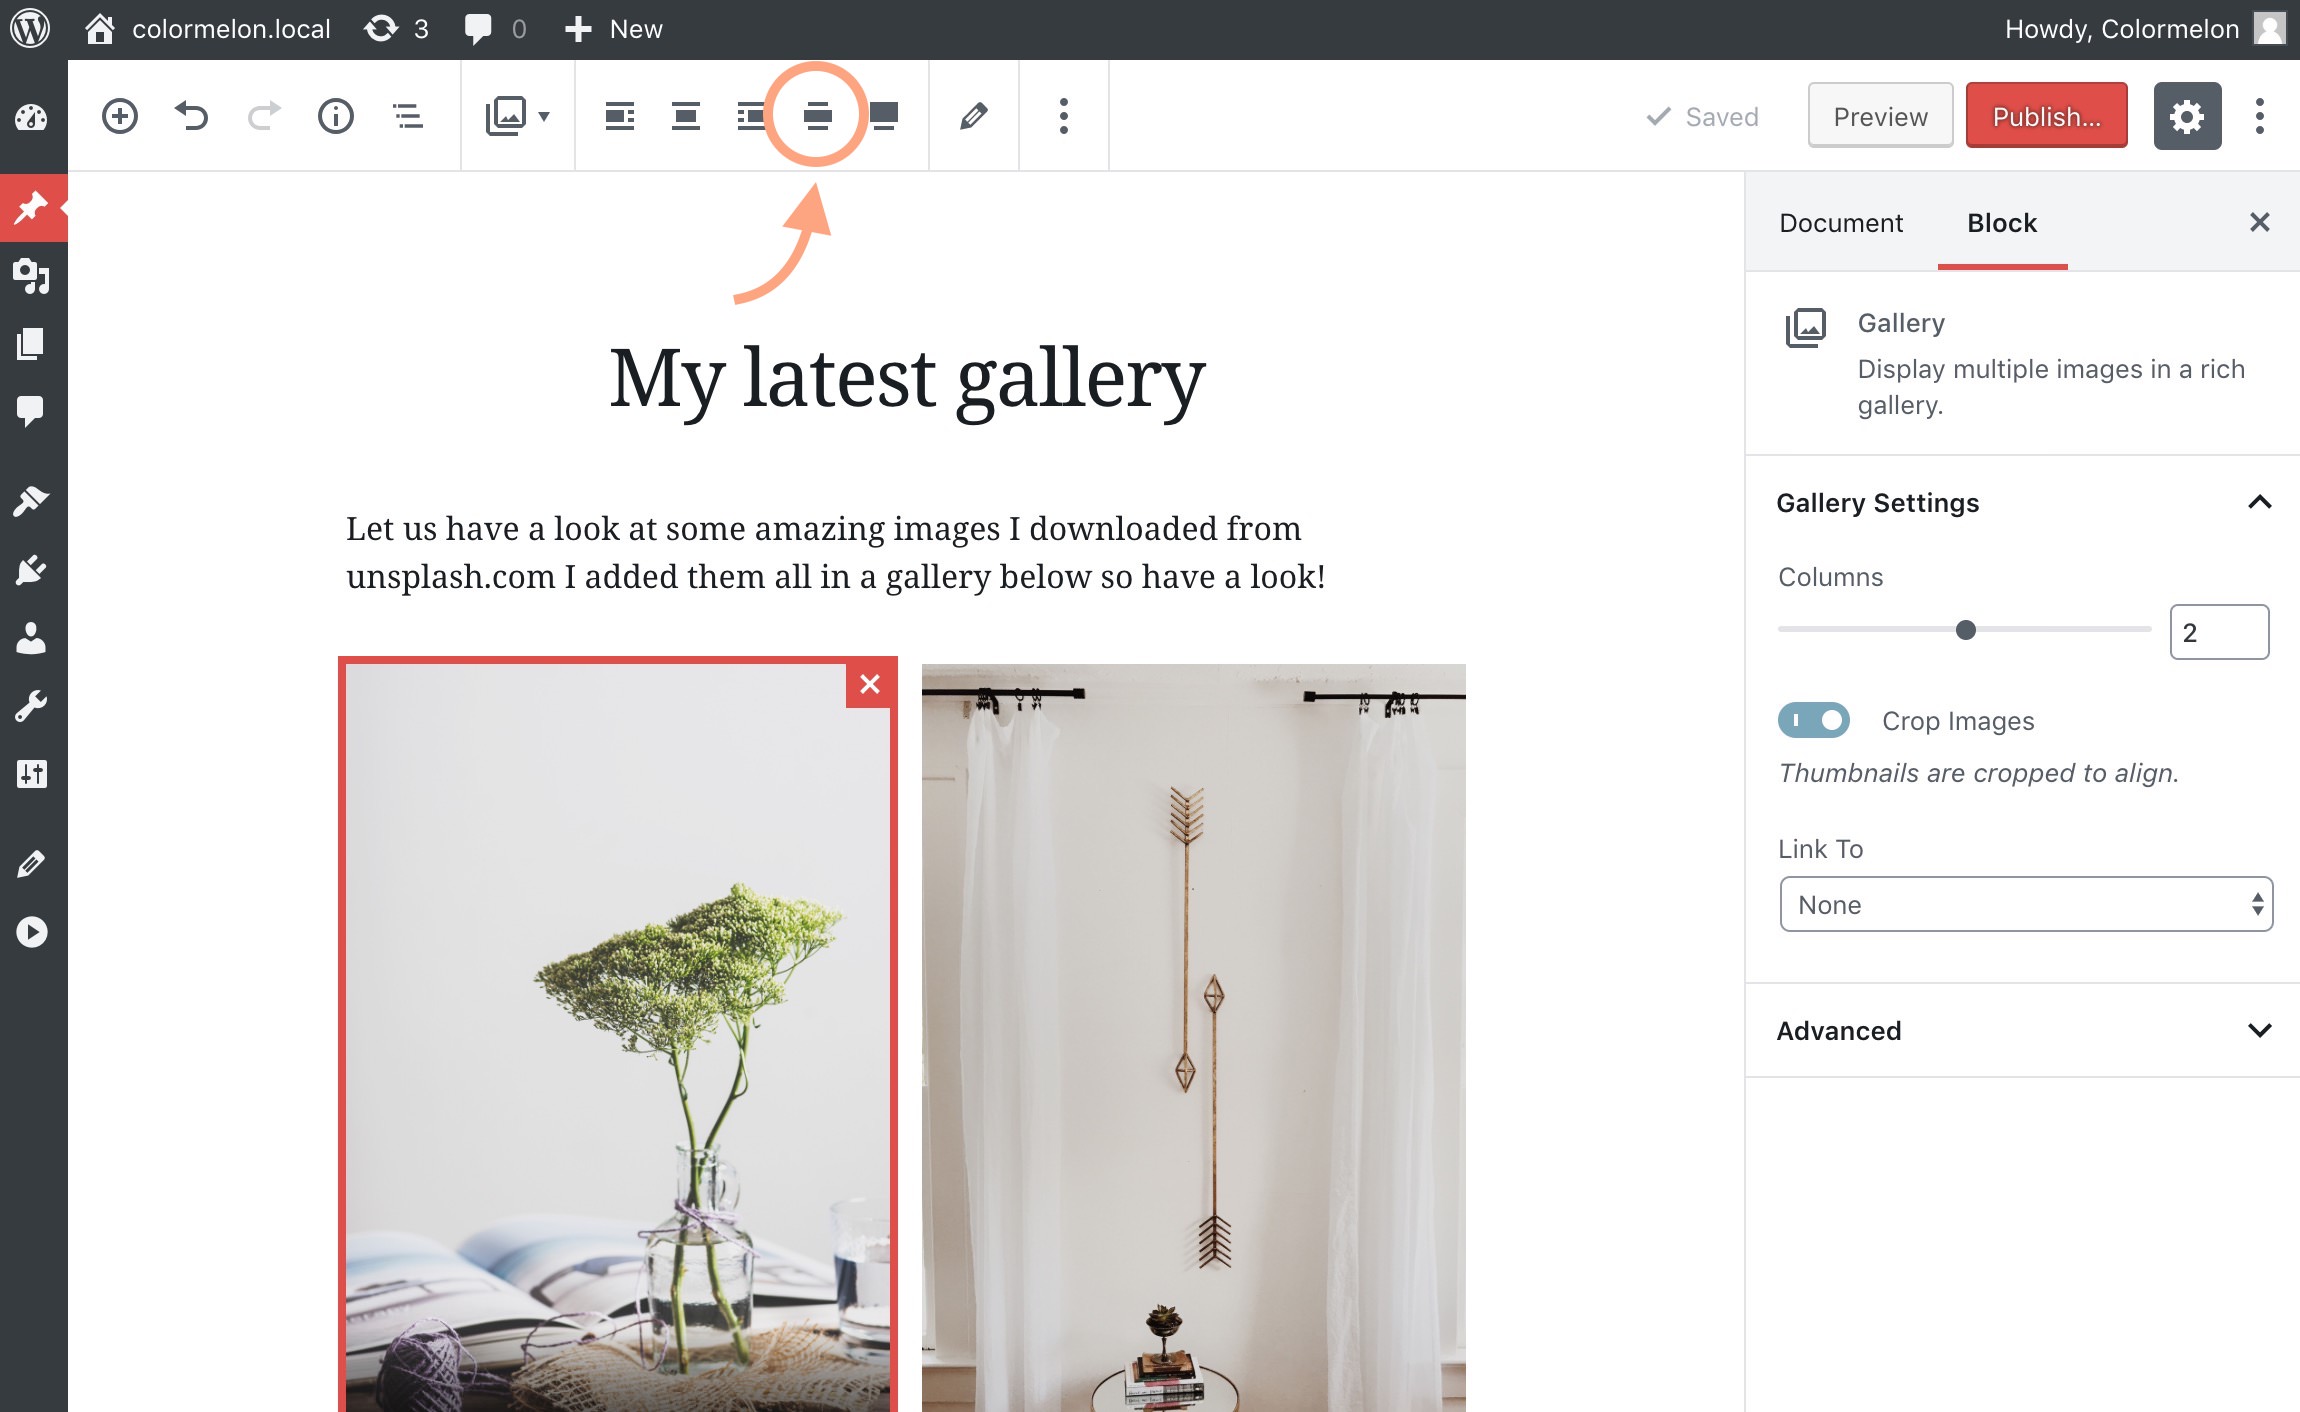
Now let’s make some changes to the default gallery layout. I want to have my images in a 2 column layout. I’m also going to rearrange the image order and disable the cropping.
To do all of that, follow the steps below:
- Click on any image in the gallery to make sure the gallery block is selected.
- To disable image cropping – toggle off the “Crop Images” option.
- To change column count – Use the “Columns” slider in the Gallery Settings area.
- To change the image order, click on the pencil icon located in
you toolbar and drag-and-drop your images in the correct order.
Masonry-style image gallery
As you saw in the example above, my images are all different sizes and since I have 7 images, I can’t arrange them is a proper grid layout. In this case, a masonry-style gallery will look more pleasing to the eye.
The method I’m going to show you is not perfect. It’s a bit of a DIY way of creating a masonry gallery but right now it’s the only way I know how to do it, so I figured that it’s worth showing. It can be useful in situations where the image ratio is not consistent and with a bit of patience it can look really nice.
To create a masonry-style image gallery, first you need to decide on the exact layout.
I’m going to have 2 images in the first row, 1 image in the second row, and 2 rows with 2 images per row.
Here’s how I’m going to do it:
- Create a new gallery block (/ gallery)
- Upload the first 3 images. 2 for the first row and 1 for the second row.
- Set the column count to 2 columns. The first 2 images will be side by side and the 3rd image will automatically drop to the second row creating the first part of our layout.
Next, we need to add 4 images in 2 columns. If we’re going to add them to the gallery block we just created, it will continue adding the images in a grid-style and we will lose that single image in the second row.
Instead we are going to add another gallery block with 2 column layout.
- Add a new gallery block under the one we just created.
- Select the rest of your images and set them to 2 column layout.
Depending on the theme you are using, there might be larger gaps in between the separate gallery blocks. That’s why I mentioned that this is not a perfect method.
But here’s a chance to be creative and maybe add a bit of text in between these gallery gaps to make it less noticeable.
Image gallery pro tips
Since the new block editor merged with WordPress 5.0, there are a number of things we can do with galleries and images that we couldn’t before.
Here are a couple of creative things you can do to make your image galleries really pop!
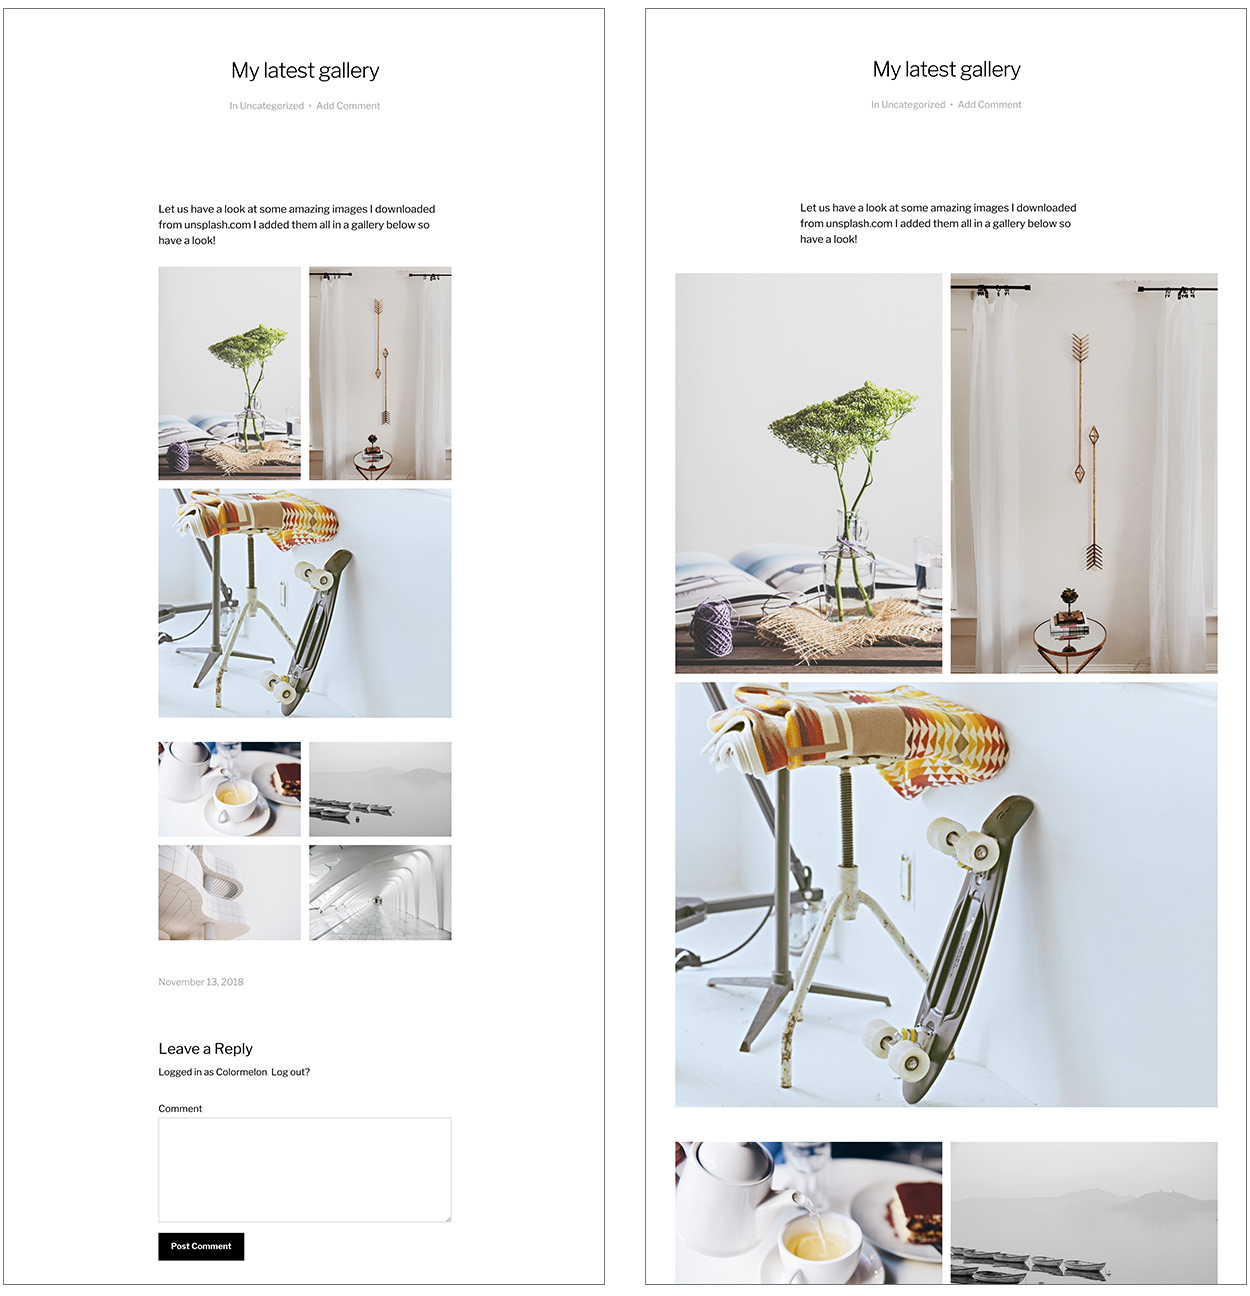
Wide width image gallery
This will work only in WordPress themes that support Wide Width image feature, so if you don’t see this option in your toolbar, your theme doesn’t support this option.
Select your gallery block and click on the Wide-width icon located in your toolbar.
This will make your image gallery wider than the main content area!
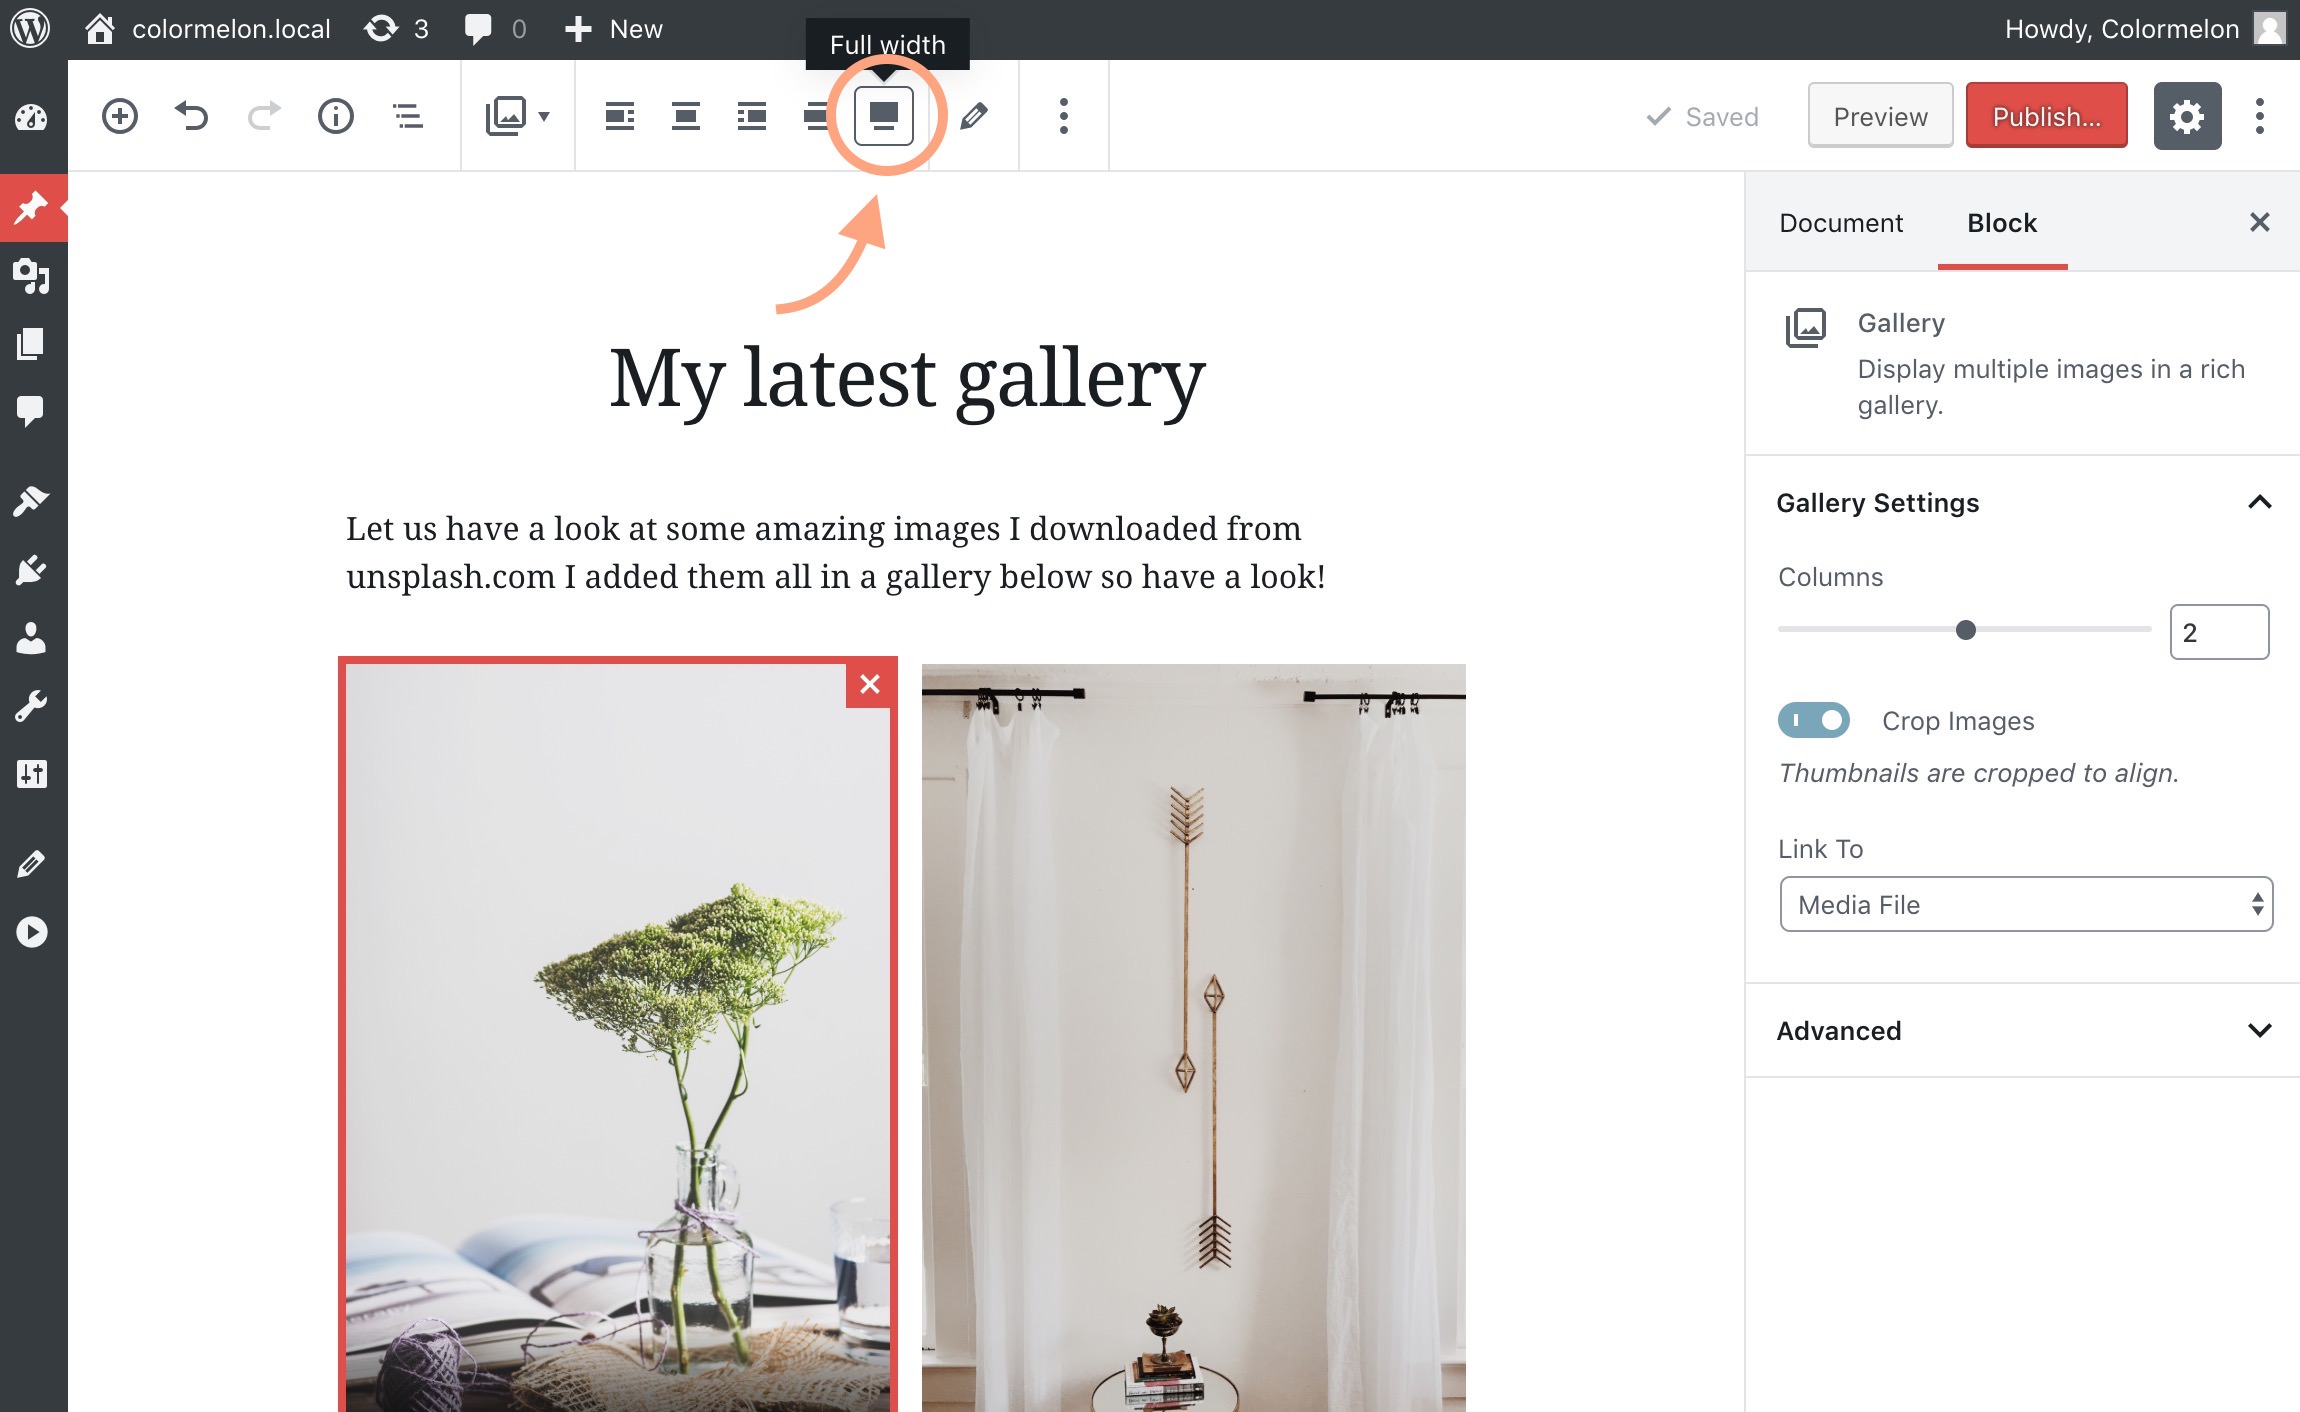
Full-width gallery
Just like you can set your gallery to Wide-Width, you can make it span all the way to the edges of your page (if your WP theme supports this option).
This layout style will work best for 3 or 4 column image galleries. Otherwise, the images can get a bit too big. Also, if you decide to use the Full-width option, make sure your image quality is really good, otherwise your images can get pixelated on larger desktop monitors!
To set your gallery to Full-width, select your gallery block and click on the Full-width button located next to the Wide-width button.
Pop-up gallery feature
Make your image gallery not only pretty but functional as well. When a user is browsing your fancy new image gallery, there is a change that he will want to click on these images to see them up close.
There are a number of plugins out there that give you the pop-up gallery functionality. We have tested a couple of them in our WordPress themes and right now our two favorites are PhotoSwipe and lightGallery. We compare both of these gallery plugins in this “best pop-up galleries for photographers” post. Check it out if you want to know more.
For this tutorial, let’s install PhotoSwipe. It’s free, looks nice and professional, and can be navigated via mouse click, keyboard arrows, and swiping, so it will serve us well.
Here’s what you do to add a pop-up feature to your image gallery.
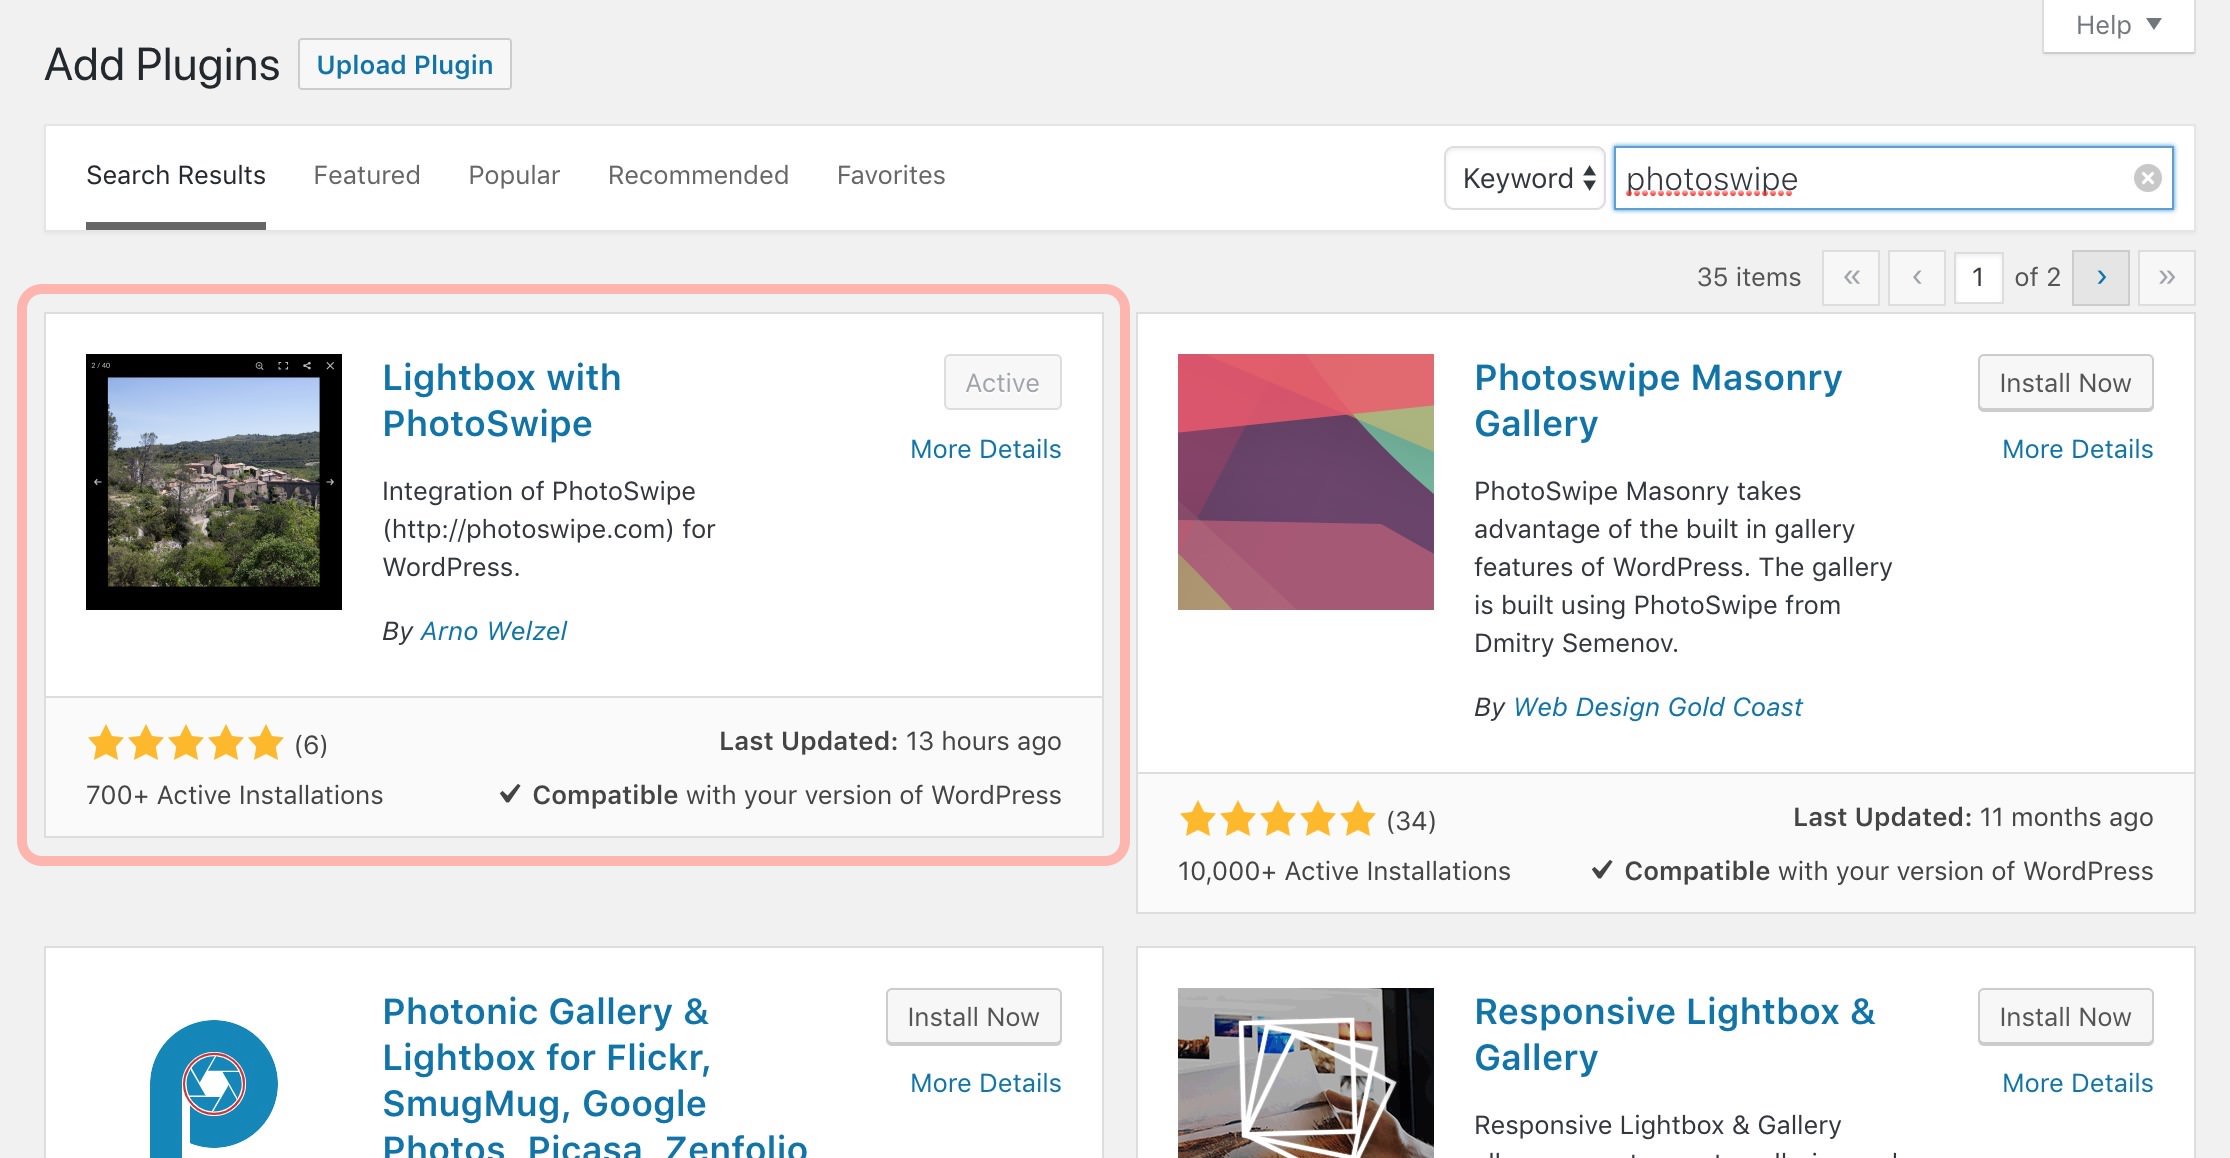
- Go to Plugins > Add New and search for “PhotoSwipe”
- Install PhotoSwipe by Arno Welzel
- Go back to your post with image galleries
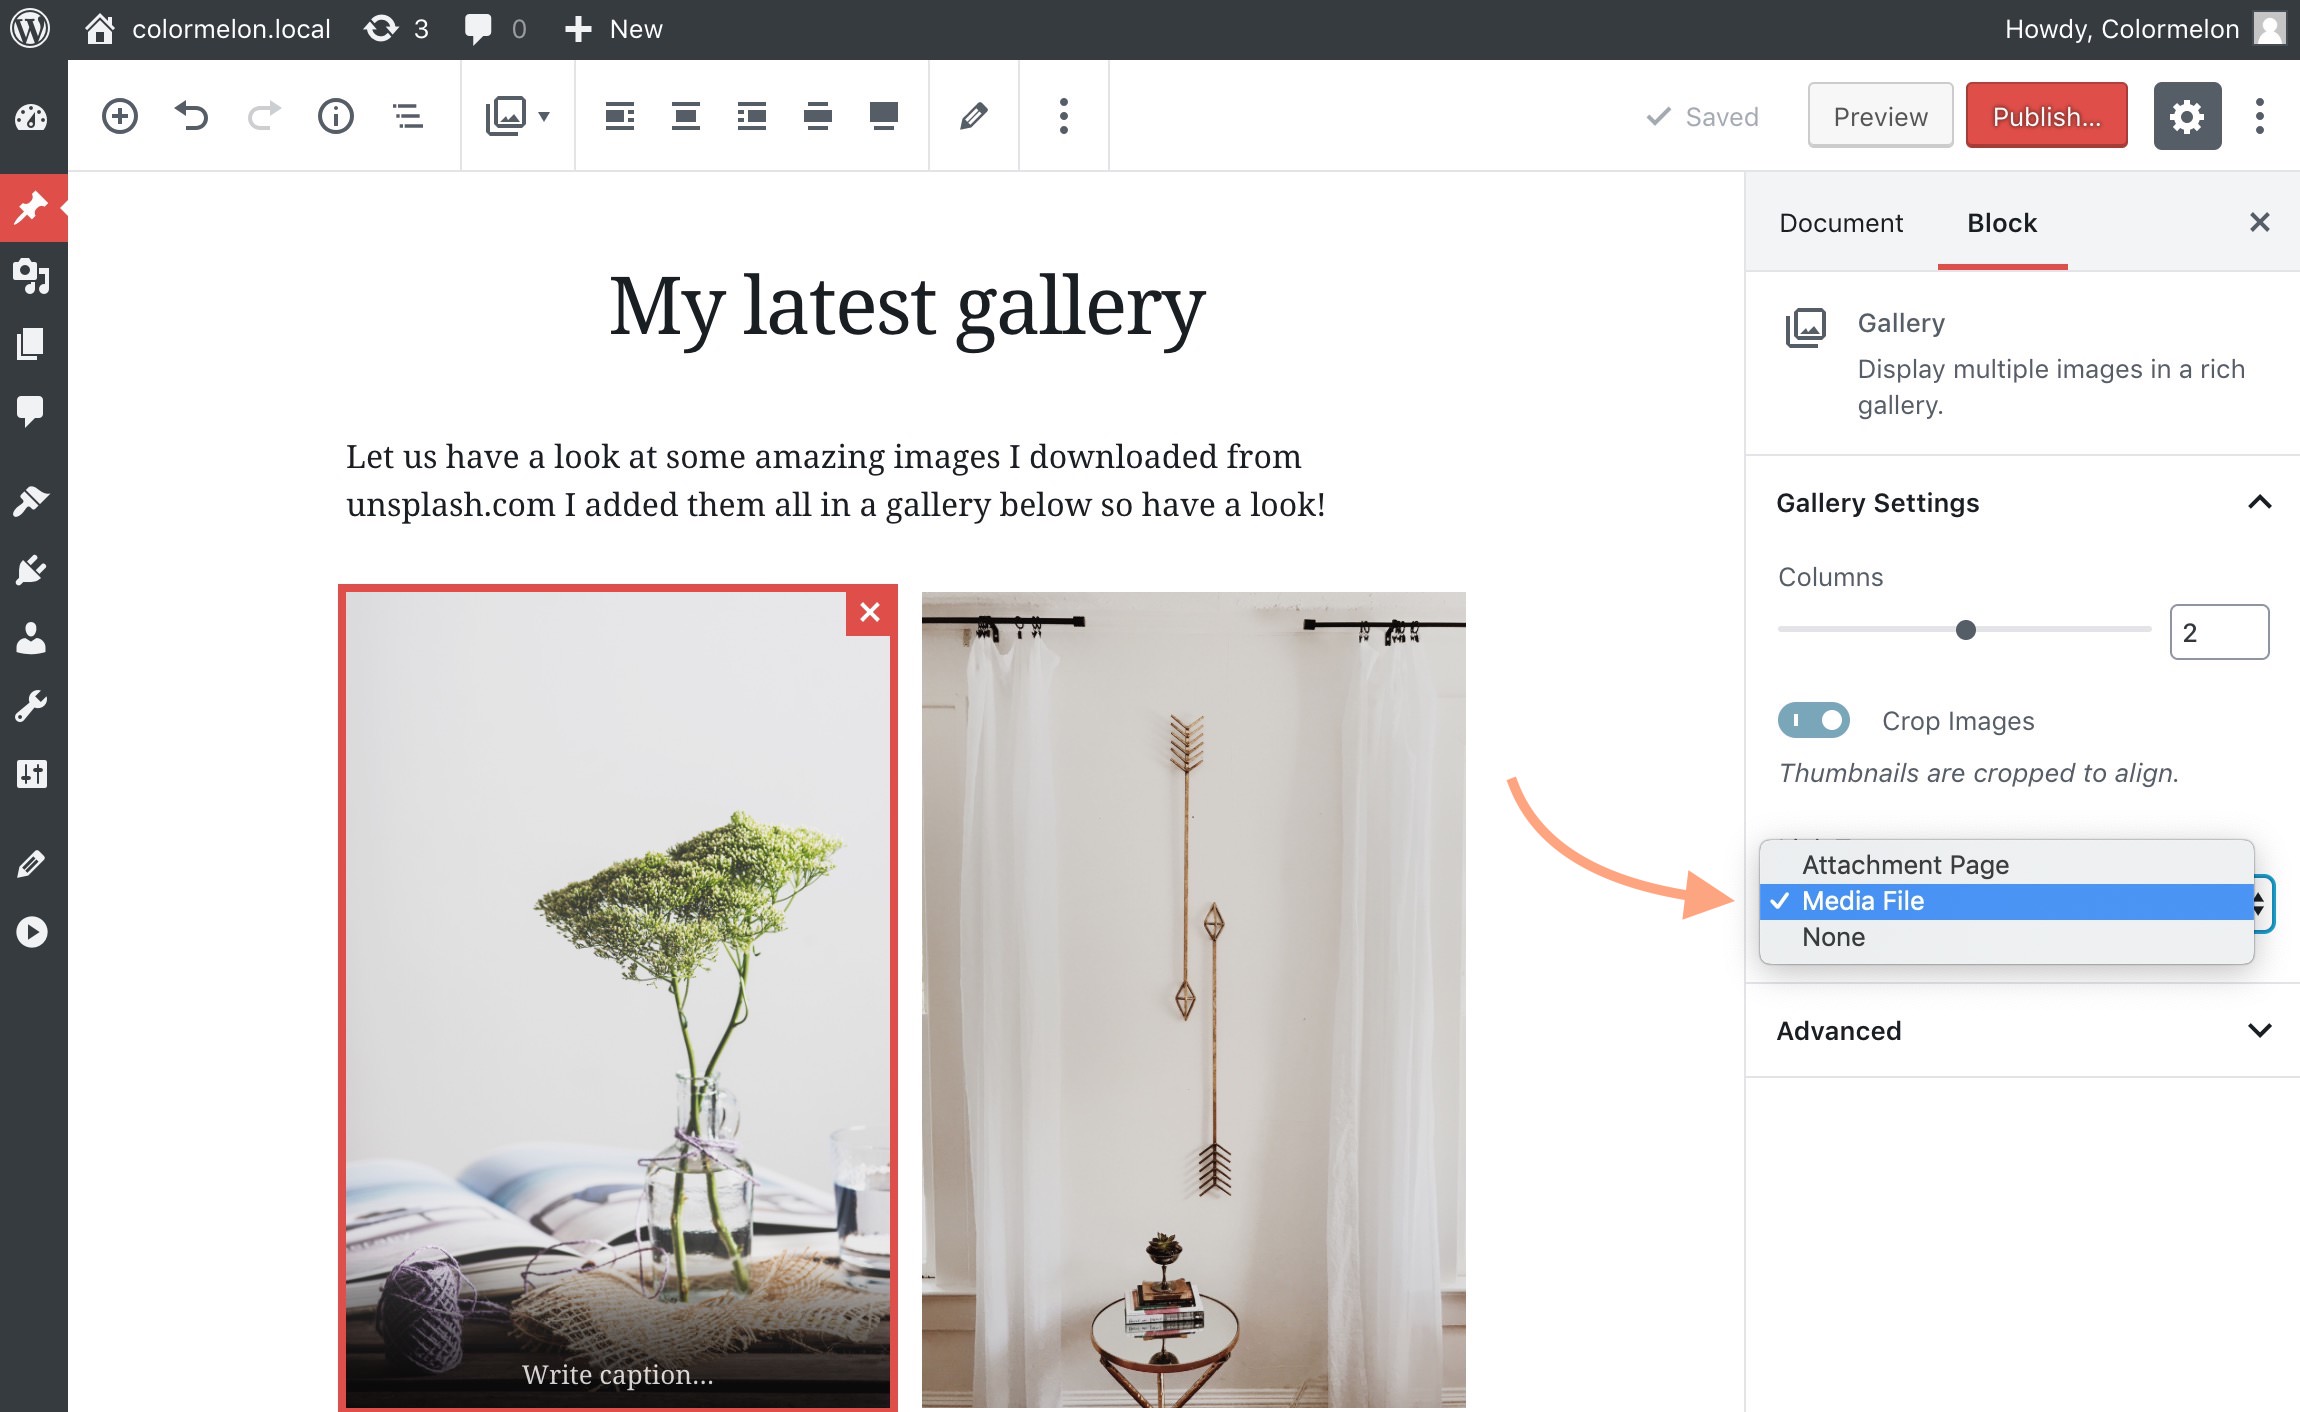
- Click on each of your gallery blocks and make sure that you set the “Link To” option to Media File
All done! Now your galleries can be clicked on to enter a full-screen mode.
Conclusion
I hope this post helped you understand how easy and fun it is to create image galleries in the new WordPress block editor.
Now go and create beautiful, rich galleries and share them with the world!
Is there anything else you’d like to know about the new block editor and how it works? Leave a comment below and I will do my best to help out!
nice