Creating patriotic home decor is a wonderful way for kids to celebrate national holidays and show their love for their country.
Whether it’s for the Fourth of July, Memorial Day, or any other national celebration, these crafts are fun, easy, and perfect for adding a touch of red, white, and blue to your home.
Here are some creative ideas that will not only keep your little ones entertained but also teach them about the importance of patriotism.
Let’s go!
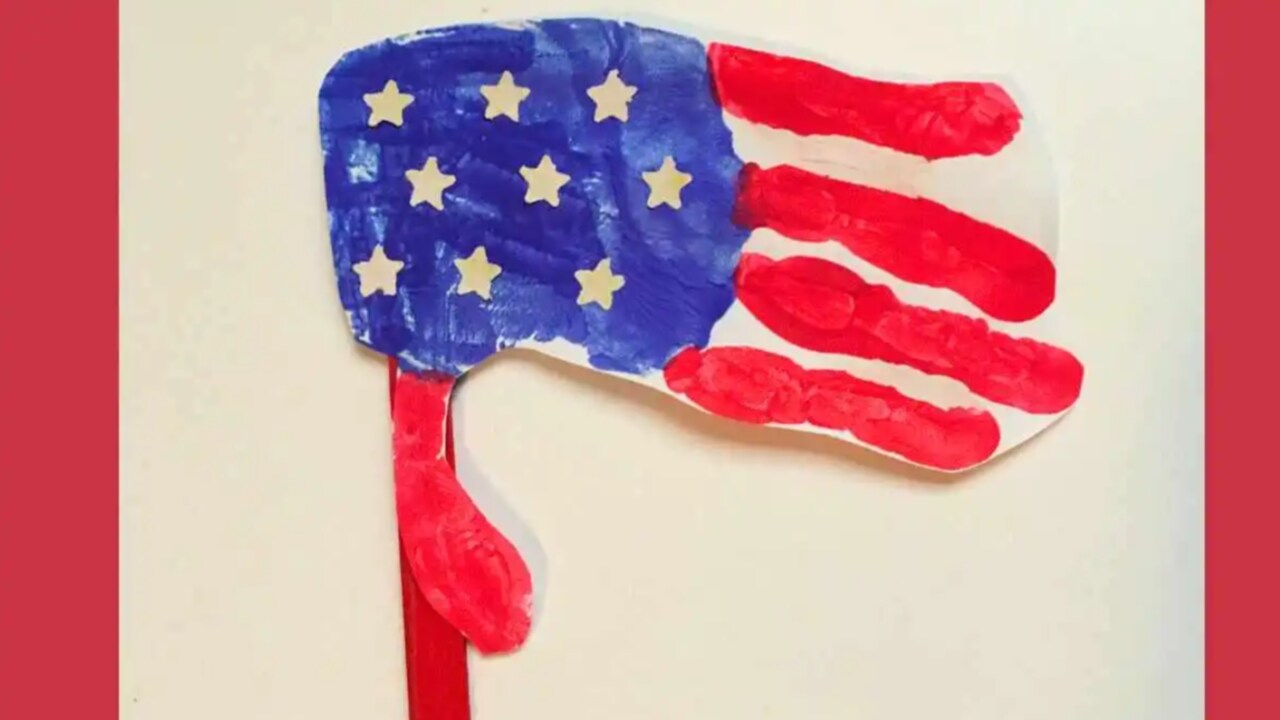
1. Handprint American Flag
Materials:
- White poster board or canvas
- Red and blue paint
- Paintbrushes
- Kids’ hands
Instructions:
- Paint the blue square in the top left corner of the poster board.
- Use red paint to make handprints across the board, leaving spaces in between for the white stripes.
- Once the red paint dries, let your kids use their fingers to add white stars in the blue square.
- Display the finished flag proudly on your wall or door.
2. Patriotic Windsock
Materials:
- Empty tin cans
- Red, white, and blue paint
- Paintbrushes
- Red, white, and blue ribbon or crepe paper
- String
- Nail and hammer
Instructions:
- Clean the tin cans thoroughly and remove any labels.
- Paint the cans in patriotic colors and allow them to dry.
- Use the nail and hammer to punch two holes on opposite sides of the can’s rim.
- Thread the string through the holes to create a handle for hanging.
- Cut the ribbon or crepe paper into long strips and glue them around the bottom edge of the can.
- Hang the windsocks outside and watch them flutter in the breeze.
3. Star-Spangled Banner Banner
Materials:
- Construction paper (red, white, blue)
- Star stencil
- Scissors
- Glue
- String or ribbon
Instructions:
- Cut out star shapes from the construction paper using the stencil.
- Glue the stars onto alternating red, white, and blue pieces of construction paper.
- Attach the decorated papers to a long piece of string or ribbon to create a banner.
- Hang the banner across a mantle, doorway, or window for a festive touch.
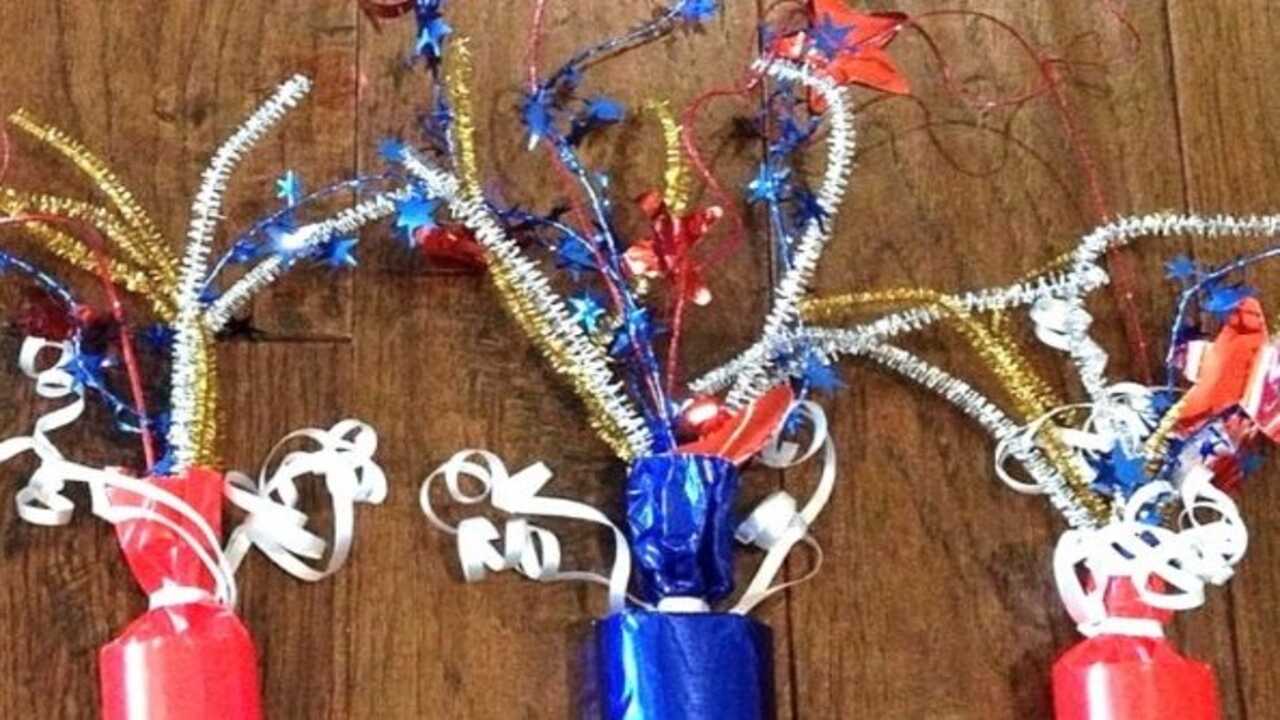
4. Firecracker Centerpieces
Materials:
- Cardboard tubes (from paper towels or toilet paper)
- Red, white, and blue paint
- Paintbrushes
- Glitter (optional)
- Construction paper
- Tape
- Red, white, and blue tissue paper
Instructions:
- Paint the cardboard tubes in red, white, and blue and let them dry.
- Add glitter to the paint for a sparkling effect.
- Cut out star shapes from the construction paper and tape them around the tubes.
- Fill the tubes with tissue paper to resemble the sparks of a firecracker.
- Arrange the firecrackers in the center of your table for a festive centerpiece.
5. Patriotic Pinwheels
Materials:
- Red, white, and blue construction paper
- Scissors
- Pushpins
- Pencils with erasers
- Glue
Instructions:
- Cut out a square from the construction paper.
- Fold the square diagonally to create a triangle, and then unfold.
- Cut along the fold lines, stopping about an inch from the center.
- Bring every other corner of the cut edges to the center and glue them in place.
- Push a pin through the center of the pinwheel and attach it to the eraser end of the pencil.
- Watch the pinwheels spin in the wind as you celebrate!
6. Liberty Crown
Materials:
- Green construction paper
- Scissors
- Stapler
- Markers or crayons
Instructions:
- Cut a strip of green construction paper long enough to fit around your child’s head.
- Cut out seven triangles from the construction paper for the crown’s spikes.
- Staple or glue the triangles evenly along the strip.
- Decorate the crown with markers or crayons.
- Staple the ends of the strip together to fit your child’s head.
- Let your child wear their Liberty Crown proudly during your patriotic celebrations.

7. Painted Mason Jar Lanterns
Materials:
- Mason jars
- Red, white, and blue acrylic paint
- Paintbrushes
- Tea light candles (battery-operated for safety)
- Star stickers or stencils
Instructions:
- Paint the mason jars in solid colors or create patterns using the red, white, and blue paint.
- Use star stickers or stencils to add star designs on the jars.
- Once the paint is dry, place a tea-light candle inside each jar.
- Light them up at night for a glowing patriotic display.
8. Patriotic Paper Chains
Materials:
- Red, white, and blue construction paper
- Scissors
- Glue or tape
Instructions:
- Cut strips of construction paper about an inch wide and six inches long.
- Form a loop with a strip and glue or tape the ends together.
- Thread the next strip through the loop and secure it in the same way.
- Continue this process, alternating colors, until the chain is as long as desired.
- Hang the paper chains around the house or outdoors for a festive touch.
9. Pom-Pom American Flag
Materials:
- Red, white, and blue yarn
- Pom-pom maker or a piece of cardboard
- Glue
- Canvas or poster board
Instructions:
- Make pom-poms using the yarn in red, white, and blue.
- Arrange and glue the pom-poms on the canvas or poster board to create an American flag pattern.
- Let the glue dry and display the soft, fluffy flag in your home.
10. Patriotic Sun Catchers
Materials:
- Red, white, and blue tissue paper
- Clear contact paper
- Scissors
- Star or flag-shaped template
Instructions:
- Cut out star or flag shapes from the clear contact paper.
- Cut the tissue paper into small squares.
- Stick the tissue paper squares onto the sticky side of the contact paper, filling in the shapes.
- Cover with another piece of contact paper to seal the tissue paper inside.
- Cut out the shapes and hang them in a sunny window.
11. Glittery Star Wands
Materials:
- Wooden dowels or sticks
- Construction paper
- Glue
- Glitter
- Ribbon
- Scissors
Instructions:
- Cut out star shapes from the construction paper.
- Apply glue to the stars and sprinkle with glitter.
- Once the glue is dry, glue the stars to the ends of the wooden dowels.
- Tie ribbons around the dowels just below the stars.
- Let your kids wave their wands during parades or festivities.
12. Red, White, and Blue Slime
Materials:
- Clear glue
- Baking soda
- Saline solution (contact lens solution)
- Red and blue food coloring
- Glitter (optional)
Instructions:
- In a bowl, mix clear glue with a few drops of food coloring.
- Add a pinch of baking soda and mix well.
- Slowly add saline solution while stirring until the mixture forms into slime.
- Add glitter if desired.
- Make separate batches for red, white, and blue slime, then let the kids mix them together for a patriotic playtime activity.
13. Patriotic Tie-Dye T-Shirts
A few in red white and blue for a psychedelic patriotic event.
byu/BigFatChickinDiapers intiedye
Materials:
- White T-shirts
- Red and blue fabric dye
- Rubber bands
- Plastic squeeze bottles
- Plastic table cover or old newspaper
Instructions:
- Lay out the plastic table cover or newspaper to protect your work surface.
- Twist and band the T-shirts in various patterns using rubber bands.
- Mix the fabric dye according to the package instructions.
- Use the squeeze bottles to apply the dye to the shirts.
- Let the dye set according to the instructions, then rinse and wash the shirts.
- Let the kids wear their custom tie-dye shirts during patriotic events.
14. Patriotic Paper Plate Tambourines
Materials:
- Paper plates
- Red, white, and blue paint or markers
- Stapler
- Dry beans or rice
- Ribbon
- Hole punch
Instructions:
- Decorate the backs of two paper plates with paint or markers.
- Place a handful of dry beans or rice between the plates.
- Staple the plates together around the edges to seal them.
- Punch holes around the edge and tie ribbons through the holes.
- Shake your tambourines to make music during celebrations.
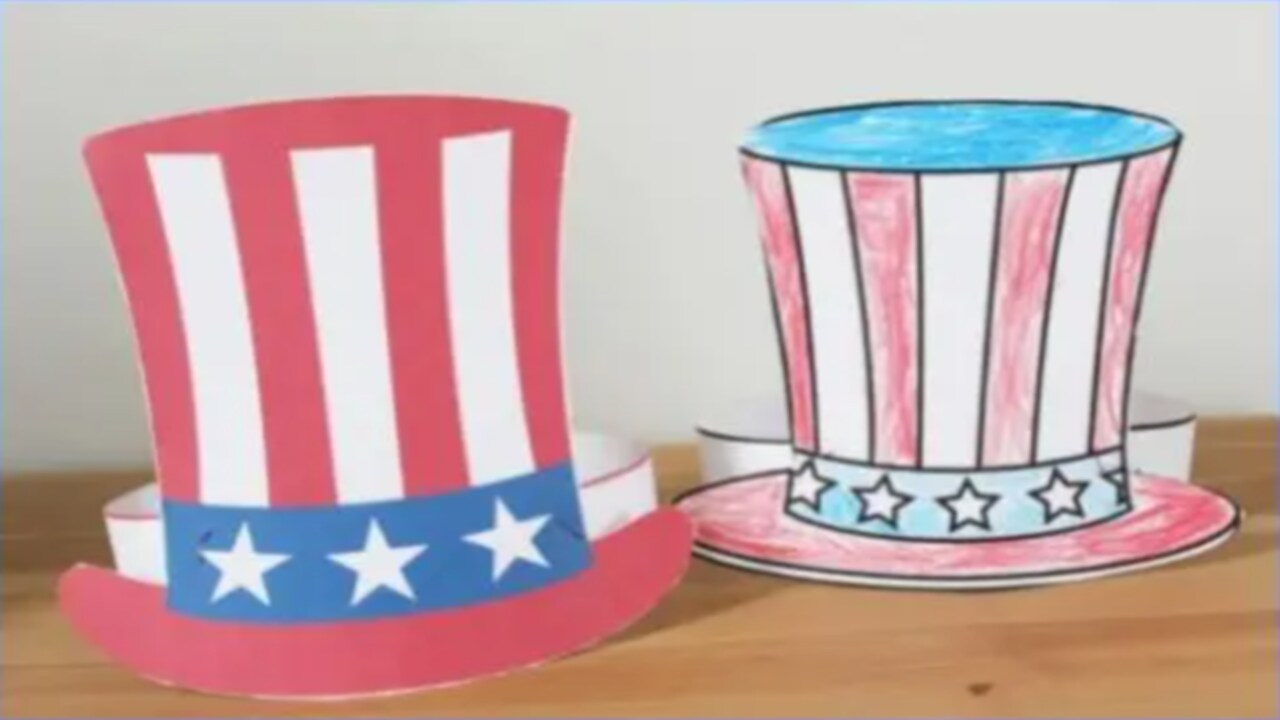
15. Uncle Sam Hats
Materials:
- Red, white, and blue construction paper
- Glue
- Scissors
- Tape
Instructions:
- Cut a large rectangle from white construction paper to fit around your child’s head.
- Cut red stripes and glue them vertically on the white rectangle.
- Cut a blue band and glue it around the bottom of the rectangle.
- Cut out white stars and glue them onto the blue band.
- Tape the ends of the rectangle to form a cylinder, then create a brim by cutting a circle larger than the cylinder and gluing it to the base.
- Let your child wear their Uncle Sam hat proudly.
Why Engage Kids in Independence Day Decor
Engaging kids in Independence Day decor activities offers a myriad of benefits, from developing essential skills to fostering a sense of patriotism and family unity. Here are the details:
| Reason | Description |
|---|---|
| Fosters Creativity | Crafting allows kids to express themselves and explore their creativity through various projects. |
| Builds Fine Motor Skills | Cutting, gluing, and assembling decorations help improve kids’ fine motor skills and coordination. |
| Teaches Patriotism | Engaging in patriotic crafts helps kids understand and appreciate the significance of Independence Day. |
| Family Bonding | Crafting together provides quality family time and strengthens bonds among family members. |
| Educational | Kids learn about historical events and symbols associated with Independence Day through crafting. |
| Boosts Confidence | Completing craft projects gives kids a sense of accomplishment and boosts their self-esteem. |
| Encourages Teamwork | Working on crafts with siblings or friends promotes teamwork and cooperation. |
| Creates Lasting Memories | Crafting for holidays creates special memories that kids will cherish for years to come. |
| Adds Festive Atmosphere | Handmade decorations add a personal touch and enhance the festive atmosphere at home. |
| Promotes Cultural Awareness | Understanding the traditions and symbols of Independence Day fosters cultural awareness and pride. |
| Enhances Problem-Solving Skills | Kids develop problem-solving skills as they figure out how to assemble and create their crafts. |
| Reduces Screen Time | Crafting provides an engaging alternative to screen time, encouraging hands-on activity. |
| Teaches Resourcefulness | Using household items and recycled materials for crafts teaches kids to be resourceful. |
| Provides Fun and Entertainment | Crafting is a fun and engaging way for kids to spend their time, especially during holiday breaks. |
Conclusion
- These patriotic home decor crafts are not only fun and engaging for kids, but they also help instill a sense of national pride and creativity.
- Whether your children are making a handprint flag or a sparkling firecracker centerpiece, they’ll enjoy being part of the holiday preparations.
- Plus, you’ll have charming decorations to display around your home. Happy crafting!
Other Articles
Spread the word